Well Water Testing DIY To Advanced Lab Testing
Podcast: Play in new window | Download
Subscribe: RSS
Welcome back to the Clean Water Made Easy Podcast! On today’s episode, I discuss the importance and how-to of Well Water Testing.
I get into specific potential contaminants to consider testing for as well as Do It Yourself testing versus using a certified and licensed analytical laboratory. I hope you find this episode useful and informative.
Well Water Testing Topics Covered:
- Well water testing do it yourself
- When to get lab water tests done
- Reasons why one should test their well water
- The advantage of do-it-yourself test kits
- Figuring out what your potential contamination sources are
- Different types of contaminants for which to test
- How to self-test for water hardness
Resources:
Transcript
Hello and thanks so much for tuning in to the Clean Water Made Easy Podcast. My name is Gerry Bulfin. I’m a water treatment contractor and WQA certified Master Water Specialist.
In this podcast series I give easy-to-follow tips and information all about well systems, well water quality, well water treatment systems, and how to improve quality of your well water. In this podcast, we’re going over well water testing. Basically, reasons why you should test your well water periodically, what to test for, how often should I test my well water, when to use a certified lab versus doing it yourself, and a test you can do yourself today at home without any test kit and get the basic idea of one of the parameters of your water.
Download Free Guide on Well Water Testing
Now, some of these is a little technical but if you want I have a free guide that I created to go along with today’s podcast. It’s our complete guide to well water testing and I’m offering it free. If you want you can get it by texting the word “watertest” all one word, watertest, to 44222 and then we’ll get it going to you. Or if you want you can download it, go to website cleanwaterstore.com/podcast and this is episode 3 so just go to episode 3 and you can get the guide that way too. In the guide I showed some sample water test reports, what to test for based on your needs and goals and situation ,and also some easy-to-follow charts and resource on water testing.
Now there are really a large number of well water test kits and water testing labs available for the home water well owner, just really good. They’re getting better, cheaper, and more accurate and there’s a proliferation of well certified tests too. You can get certified labs in all states and so these tests make it relatively inexpensive for you to test the water yourself, the test kits or you can have your water tested at a lab.
Importance of Well Water Testing
So you might ask, “Why should I test my water?” well, if you think about it municipal city water systems test their water routinely, regularly. They’re on top of it, making sure the water is safe and that they’re required too anyway. But there’s no requirement to test a private well, except when you first have it drilled or maybe you’re refinancing your home and they know you’re on a private well and they might want to a basic test for bacteria, perhaps nitrate, and few other things.
But the government isn’t going to come after you to make you test your well water and situations can change over the years. Perhaps your well was safe at one time but now it’s contaminated but you don’t know it because you can’t smell or taste the contaminant. So it’s a good idea there’s just a few basic things you should test for on a regular basis. The decision on what to test for is really based on the types of land you use in your well and what your goals are.
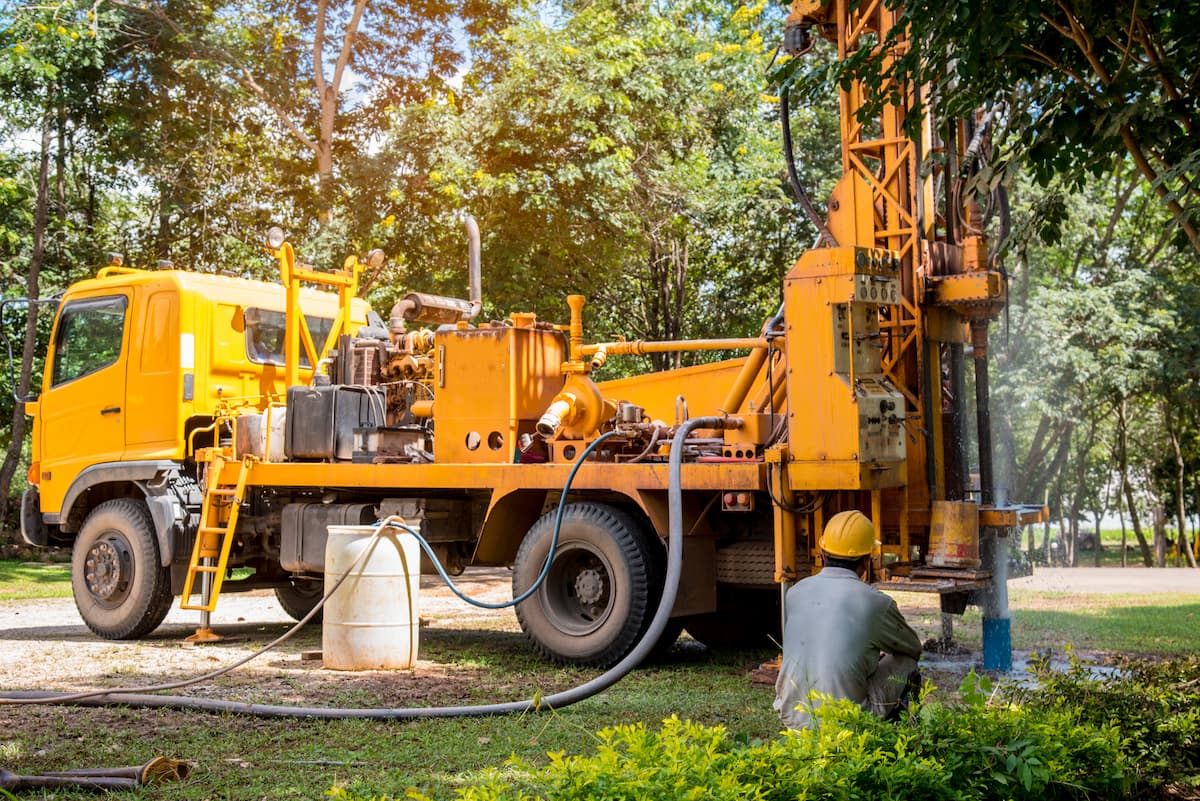
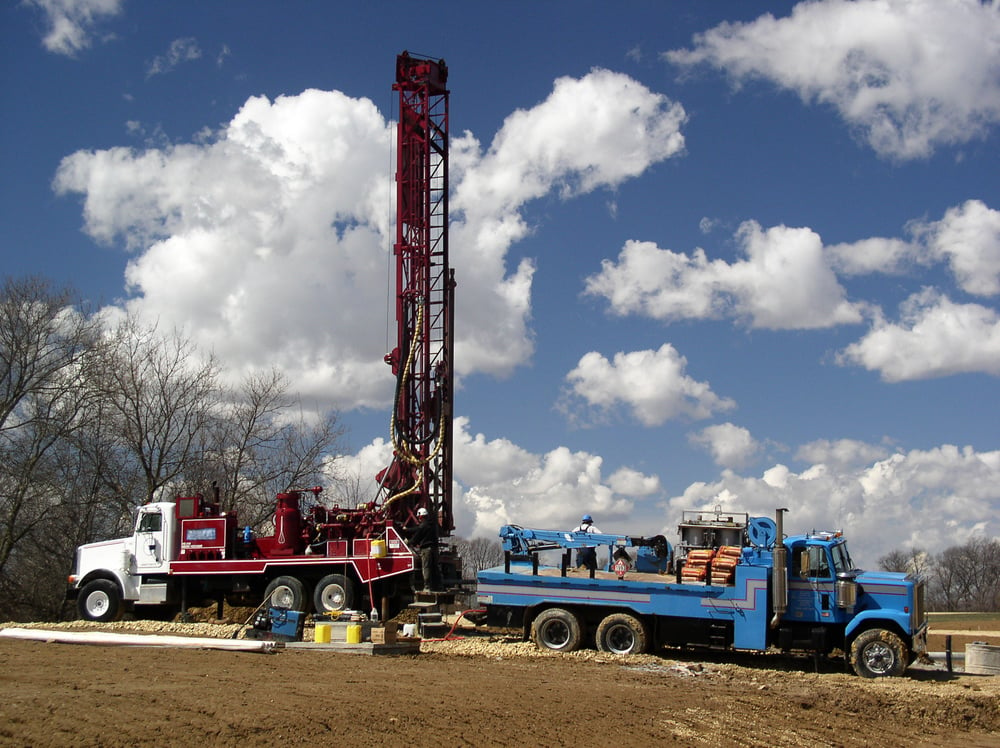
You know we really find like 6 main reasons why folks want to get their well or should have their water tested. The first one is, you have your new well installed. So it’s brand new or perhaps you’re moving to an area, moving to a new home that has a well, you don’t know anything about the water quality. That’s a good time to get a comprehensive test done. Or you’re told by your bank that you need to, for financing reasons, in other words you’re getting financing the banks might, will generally require a test that has to be done by certified lab.
Another reason to get it tested is, you come to the conclusion that perhaps your health problems resolve the water or you just want to find out, “I have health problems”, “I have a stomach problem”, “I have a skin irritation” whatever, you might want to just rule out that it’s not coming from the water. That’s a good reason to have your water tested. You may want to troubleshoot a water treatment system. Find out if your water softener is working, if your iron filter, or other treatment device. Maybe your under-sink or your reverse osmosis, you want to find out how’s it doing, is it working? That’s a good time to test the water.
And then a really common one is, I have aesthetic issues with my water so people would come to say, “Yeah, I think my water is fine I don’t have any problems with it, it tested fine for bacteria, there’s no bacteria in it but it stains, I have rust problems, I have sediments, I have odors” whatever. There’s all different kind of aesthetic issues. In other words, it’s not a health threat, it’s an aesthetic problem. That’s a good reason to have it tested.
And the last one that falls into the main group is corrosion problems. People say “You know, the water is fine but it’s just corroding the heck out of my pipes. I’m constantly fixing leaks in my pipes or I get blue stains from copper in my sinks, so I know that the copper is corroding so I have corrosion problems”, that’s a good reason to have your water tested.
So the next thing to think about is when do I use certified lab versus doing it yourself. Well, the first three, you’re getting a new well installed or you’re new to the well, you’re being told by your bank that you need you need it for financing, or you want to see if your health problems are related to the well and noticed that it’s a health issue.
Water Testing Accuracy
One of those 3 things, you should use a certified lab. Because they have standard methods and higher accuracy than the home test kit for the most part. Depends on the test but generally, especially for health and for reasons for bacteria and nitrate, it’s good to have a certified test done. Plus, it’s good idea to at least have a certified test done at least once. In other words you’re new to the home or you’re new to the well, just get it done at least you know at that point there’s no problems.
It gives you peace of mind because you know if you start out with the problem then and it’s serious and you know you can do something about it. But if you don’t get all those tests done then you may live with water that causes some problems that you don’t know about.
So, the advantage of do-it-yourself test kits though, are that you get the results immediately, they’re lower cost, and maybe you don’t need to be exactly down to the hundredth parameter of some contaminant that you are trying to test for, in other words if it’s off by point 1 or point 2 percent, it’s okay. So give you an example, like say you’re trying to troubleshoot a water treatment system.
You want to know, “Hey I’ve got iron in my water. I think the iron ruined my water softener. How much iron do I have?”, you can do a home test kit whether you have 2.5 or 2.8 parts per million of iron, it’s not going to matter in terms of getting the iron filtered that's going to solve the problem. So you can get a fairly accurate home test kit and get set up to know what kind of iron filter or if you have iron problem whatever, or maybe you want to find out if your water softener is working.
Do-It-Yourself Kit
Well actually it’s better to have a home do-it-yourself kit because you don’t want to have to take a sample to the lab every time you check your water softener, say you want to adjust your water softener to use less salt. Well you don’t want to have a laboratory test done every time so there’s some things like that that you want a home test kit for.
Although that is basically it so if you’re troubleshooting a system, if you have aesthetic issues with odor, stains, or sediment, or even if you have corrosion problems. Those three areas at home test kit might be better. It’s definitely cheaper and it might be more appropriate or accurate because you can do the test, make a change to your system and do another test right there, there’s no going back and forth to the lab.
Alright, so let’s talk about it, mainly is: what contamination sources are near your well. That’s a thing to really consider when you’re trying to figure out what to test for. So like, giving you example, the environmental protection agency and also the Canadian EPA, and also the World Health Organization, they recommend consider testing your well for pesticides, organic chemicals, and heavy metals at least once before you first use it the first time.
When and What to Test.
So, and then you want to test the private supplies, your private well annually for nitrate, coliform, dissolved solids and pH. So basically that’s what they recommend. It’s up to you, a lot of times the bank, say you buy a new home or even if you’re drilling a well, they don’t usually recommend you to test or they don’t require to test for pesticides, but if it is an option you can afford, it’s not very expensive, it’s a good idea to get it done at least the first time. And then after that, get it done annually just for nitrate, bacteria, dissolved solids and pH so you can track and see what’s happened with the well. Nitrates are very common form of contamination and it tells you if there is a problem.
Bacteria Testing
So let’s talk about bacteria testing. That’s a bacteria, coliform bacteria and nitrate are the two main test that the EPA and health department and a lot of times banks require you to do. It’s very common.
Bacteria, these coliform bacteria live in the soil, they live in vegetation and also, if they’re found in the intestines of warm blooded animals they are called fecal bacteria, that’s e-coli. So it’s basically total coliform and then there’s e-coli. Total coliform is everywhere and you can easily get contamination of your well with basic coliform bacteria just by having something contaminate the water from the surface.
And it doesn’t have to be fecal matter. It can just be any kind of, you could take some grass and or bugs and throw it down in the well and have come back positive for coliform bacteria. It’s very common. It just means that, but it’s a good idea because you don’t normally find coliform bacteria in a properly installed well. So if you do see coliform bacteria in the water then that kind of gives you a signal “Hmm what’s going on here?
Something’s contaminating my well from the surface” so you’re at risk for other more horrible things like parasites or e-coli. So they just use coliform bacteria as a sort of a signal or a flag to say “Hmm this is a problem, we need to figure out what’s going on here” and often when they, when you do coliform bacteria, they often tests for e-coli too to see if it’s fecal matter. And coliform bacteria is one of the most common contaminants actually found in private water systems.
A lot of times the test itself is a test positive for coliform because the sample wasn’t taken correctly, we’ll talk about that in a minute, but it’s easy to contaminate the sample if you stick your finger in the bottle or get some water that’s coming from the actual plants or the fixture’s contaminated that is not the water itself.
So coliform is a common problem in wells and a lot of times it’s there, maybe the well was serviced, was worked on but they didn’t shock chlorinate it, they didn’t sanitize it correctly when they were done, or the top of the well is cracked, there’s a plug missing or a wire nut or something’s loose on top of the you know, conduit or some of these loose on top of the well head and allowing critters to usually enter, earwigs even cause problem with you know, coliform bacteria being positive. So it’s something to definitely test for, it’s a common thing.
Testing for Nitrates
So the next thing is nitrate, those two go together. Nitrate is very common. It’s from nitrogen fertilizers typically, but can also be from animal waste, septic systems and other sources but at least in a lot of areas in the US. If you have high nitrate, it’s usually from agriculture from nitrogen fertilizers that’s very common.
And reason being is, is that nitrate is extremely water soluble so when they added over period of years into the ground, the water slowly percolates into the groundwater and it carries with it this nitrate. It might not carry the herbicides and the pesticides they spray on vegetables and fruits, but it’s often the nitrogen fertilizer that gets into the ground.
It is a problem, it’s not a real issue to bathe in but it’s a problem for drinking. It gives a direct health issue with pregnant mothers and newborn babies so it can lcause a blue baby syndrome where they get starved of oxygen and also it causes miscarriages and it’s a problem for livestock horses. So anyway, it’s a problem but it’s not a serious issue if you’re an adult and you’re bathing in the water and you don’t drink a lot of it. But it is something to be aware of, to know. It’s also if you didn’t have nitrate before and now you have nitrate this year, it could be a sign that a septic tank is leaking into there unless you’re in an agriculture area and you just think you’re getting it from there.
Mineral Analysis
Okay, so with the next thing is general mineral, we call it general mineral analysis, that is the next type, classification or group. This gets back again if you understand your water is safe but if you’re tempting to solve a specific well water problem such as staining or odor or corrosion, you can get a general mineral analysis. This one you can do it yourself too with the do-it-yourself test kit but this typically cover alkalinity, copper, hardness, iron, manganese, nitrate, nitride, pH, sulfate, total dissolved solids, some might include fluorite and chloride, sodium, but these are the general minerals.
It’s not that they are health threats and it just gives you an idea of what’s happening. So in other words, say your water have a lot of white spotting, you might want to see what this is. Is this hard water? Do I have extremely high salt water? What’s it from? So you can find out by doing the simple general mineral analysis. If you have staining, you can do this general mineral analysis and find out, do you have iron? Do you have manganese? What’s causing the staining? The pH is very important for corrosion. We’ll talk about that in a minute. But that’s the general mineral analysis.
General Chemical Analysis
The next group lumps together chemicals and heavy metals. These are the volatile organic compounds, pesticides, herbicides. There’s also heavy metals such as arsenic, lead, mercury, then you have radon and radiological contaminants such as uranium. Radon is a gas, and the uranium is an element. And so for this you obviously need done by certified lab as well.
This is one of the tests you should get done at least once. If you live in an area within a quarter mile of a corn, soybean, or vegetable field or wheat, you should test your water for nitrate at least regularly and every couple years. Tests for pesticides and herbicides are also
We’ve done so many tests. Our customers have a small community water systems that we managed over the years and we’d seen nitrate there commonly but you don’t see a lot of pesticides herbicides in the deep groundwater even in areas where there are intense agriculture activities going on. Could be because the herbicides and pesticides are more volatile, they gas off into the air or they break down quickly. Hard to say but that’s our experience. But generally nitrate is pretty common so if you live in an area where there’s heavy agriculture going on, you might consider a one of the more exhaustive lab tests to see if there’s any pesticides herbicides.
Industrial Solvents
The next is solvents, gas, and oil. You have household and industrial solvents, gasoline, and fuel oils are common examples of volatile organic chemicals or VOCs. Some VOCs are relatively nontoxic but of course others cause cancer, birth defects, and other problems. Fuel oil and gasoline can enter the groundwater result of leaking storage tanks, we’ve seen this. Folks have, start to get fuel oil or gasoline in their well, don’t know where it came from turn out there’s an old abandoned underground fuel storage tank, that’s happened so, it can happen.
If you live within a quarter mile of an active or abandoned gas station, a home or farm fuel tank or bulk storage tank, there is a chance of being contaminated and you should test at least once for VOCs from petroleum products. You also have paint thinners, dry cleaning chemicals, industrial solvents, that would more come from leaking storage tanks, landfills or industrial spills. If you live again within say a quarter half a mile of a landfill, a dry cleaner or an auto repair shop, it’s not a bad idea to have VOCs again tested.
Pesticides and Herbicides
Pesticides and herbicides, I just talked a little bit about pesticides and herbicides. Pesticides you know, control insects and herbicides are to kill weeds. Some of these have entered groundwater as result of use on fields. And others have been found following spills or improper disposal. So it’s a good idea to get tested, especially it depends on where you live. If you live right next to a corn field and then you know, you might want to get tested it for Atrazine.
It’s a very common herbicide used and a pesticide used. And there’s several different types of herbicides and pesticides that are just so commonly used that these tests always test for those. So it’s a good idea if you live near that type of field, to have it tested for at least once, see what’s going on and then you can decide whether you want to do it again every few years or not.
Total Dissolved Solids
The last one is corrosion problems. Very common, people have corrosion they have like a pinhole leaks and I’d see blue stains from copper in your fixture sinks, that kind of thing. Or if you have galvanized pipe, that’s probably pretty old by now but if you have that then you could be getting corrosion from there, see rust stains from there. So if you experience corrosion problems, you want to test for at least pH, alkalinity, total dissolved solids, and hardness and then know what the water temperature is.
If you have those five factors then you can plug that in to a calculator online and find out if your water’s considered corrosive or not. There’s different saturation index calculators where you can, once you have these parameters, these values for the parameters, then you can get an idea what’s going on with your water from a corrosion standpoint. Of course if you’re getting corrosion, you want to, and especially if you’re getting copper corrosion then you want to test for copper and also test for lead.
Because lead, if you have a corrosion problems, if you have any kind of lead like say old lead solder in the copper fittings or even from some pipe, you should know that’s going on. And when you’re testing for lead and copper, you need to do what's called a first draw sample. For all the other tests when you’re taking the test, you want to run the water till you know you’re getting water from the ground. In other words you want to know your well’s kicked in and you’re getting fresh water coming out the ground. It’s not water’s been sitting in your pipes.
Now that’s different when you want to test for lead and copper because for those, you want to let the water sit overnight say sit on the pipe for 8 or 10 hours so you know you’re getting water from within those pipes. That would be the time when you get the most corrosion. It’s when there’s first, it’s called the first draw sample.
Standard Procedure
Okay so, some people might ask “How do I take the water sample?” “Can I mail it in?” and the truth is, you can actually. If you can’t find a local certified lab, you can send your samples in if it’s been refrigerated. Now we’re talking coliform bacteria. Other tests, as long as you follow the sampling instructions correctly that comes with the kit, then you can send those in, you don’t have to refrigerate it.
But generally what most folks do is that they’ll, there’s little freeze pack in there, you freeze that and so in other words the samples get chilled and you send it by overnight express. So in other words with, especially with coliform bacteria, it’s got to be tested within 24 hours. Also if you’re going to take your coliform bacteria sample into your local lab for testing, you want to make sure you take it over there right away.
You don't have it sit around for 4-5 hours, unless it’s been refrigerated. And then you also want to follow the instructions for sampling with coliform bacteria you want to make sure you have a sterile bottle, usually get that sterile bottle from the lab and you don’t contaminate the bottle accidentally by touching inside of it and you also want to make sure you don’t contaminate your sample accidentally by running it from a dirty or contaminated faucets.
Sometimes kitchen aerators have stuff in there that cause it to have coliform bacteria in a trace amount that can cause a false positive. So the idea is, you want to make sure you’re getting, you’re running the water for several minutes make sure it’s coming from the ground that’s for bacteria testing and you’re getting your fresh sample and you’re following instructions correctly.
And then if you have to mail it in, it should be refrigerated, send in a freeze pack, sent by overnight. So in fact you can’t actually mail, like through the mail and test for bacteria. But you can certainly mail samples for the other contaminants in general mineral analysis, it’s no problem to send in a sample with that.
Just want to make sure, any bottles that you send in that have no air in them. In other words you’d fill it up completely to the top so there’s no air in the sample, because if you have a little bit of air in there then that could cause a change in the pH of the water. So ideally you want to fill it up, cap it off right away, send it in, so you could mail it. But if you’re going to send it for a bacteria sample, it has to be sent by overnight express.
The other thing is that you have, with all these different kind of test kit options, usually there’s some phone number on there or someone you can call and talk to about what’s in the result. So it’s totally up to you to try to decipher what the results mean. A lot of times the water test will come with pretty good chart or guide saying “Okay if you have this, then this is good, this is bad”.
It gives you a different levels of what it means. And then, but sometimes you just want to talk to somebody “Okay I’ve got this test”, kind of getting a blood test done. You can look at it but you don’t know what it means. But the doctor says, he tells you what it is, same thing with water testing. With water testing you can have someone to talk to, it’s very important.
So it’s good to have someone that’s experienced with the well water parameters you’re testing for, and can give you a rundown of what it is. Or at least you could ask questions or email. That’s pretty common and it’s something you would expect.
You Can Always Do- It-Yourself
Okay, the last thing I was going to tell you was how to test water yourself for hardness. There is a way if you just want to find out how hard the water is. You can do a hardness soap test and you can just use dish soap. So the way this works is you take a 12oz measuring cup or other container and it could be like a plastic bottle or a quart jar and you measure 12 ounces into it. And then you add 10 drops of liquid dish soap and shake it.
If you see lots of suds, then your water is most likely very low in hardness. If you do not see suds, then add another 10 drops. So now you’ve added 20 drops. Then at that point, the water is slightly hard. If you have to add another 10 drops, then your water is medium hard.
If you have to add 40 drops, then your water is hard. 40 or over 40 drops, your water is very hard. So it gives you an idea, it works with most dish soap. There are some liquid dish soaps work better for this, Ivory works good.
You can get dish soap that’s made just for hardness testing too but there’s no point in doing that because at that point, if you have to pay for something you might as well just get a real hardness test kit, they’re very inexpensive and more accurate. But if you just want to know, is this water hard or not, you can do a quick test using the hardness soap test and find out right away.
Okay I hope this information has been useful to you. If you ever have any questions or problems about the water testing or wondering any more information from that, you can email us anytime. And also I wanted to tell you the next episode of this Clean Water Made-Easy Podcast, we’re going to talk about how to do a physical inspection of your home system. It’s pretty cool.
There’s a way you can look around, do a few simple checks of your pipes, your fixtures, and your toilet tank, your water heater and just know, learn a wealth of information about your water quality even if you never get a water test. We recommend of course to have your water tested too. But even before you get a water test I should say, you can go ahead and do a physical examination and learn a ton of stuff. So look for that in the next podcast.
Hey well thanks for listening, I hope you have a great day.
If you find the information here helpful, please share it with your friends.
[bctt tweet=”Have your well tested annually for coliform bacteria and nitrate.” -Gerry” username=”@gerrybulfin”]