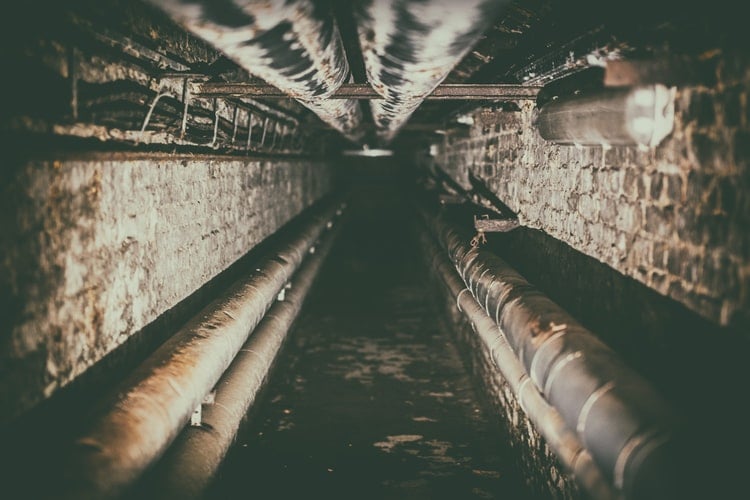
 New plumbing in residential and commercial buildings sanitize pipes, and distribution systems should be sanitized to kill bacteria. Disinfecting potable water piping is important when new water plumbing is first put online or if repairs or services have been performed.
Shock chlorinating water lines is one of the most popular methods for sanitizing pipelines. Chlorine's powerful germicidal action eliminates slime bacteria, molds, and algae in water pipes.
The threat of excessive microbial growth along the interior walls of drinking water distribution pipes is a major health concern of water distribution officials. Bio-fouling — the development of an organic bacterial community, also known as bio-film, comprises microorganisms and their secretions. It is present in almost every water distribution system, and when uncontrolled, may present a threat to public health.
Biofilms are layers of bacteria that attach to the interior walls of water distribution pipes and one another — most heavily around corroded surfaces on pipes. The bacterial community traps nutrients, microbes, and waterborne pathogens to form an almost impenetrable material eventually. Almost immediately after attaching itself to pipeline walls, the organism begins building upon itself, adding layer upon layer, forming a plaque-like coating.
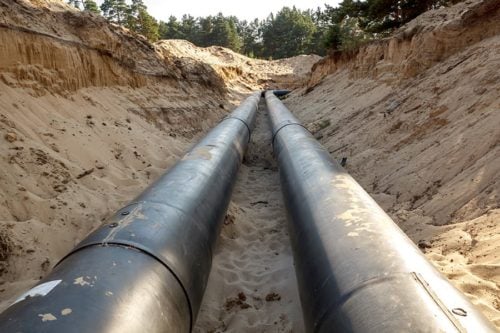
The start of bio-film growth can begin when the pipeline or distribution system is new due to dirt, foreign material, piping construction materials, and bacteria from workers and the environment introduced during the construction phase. Additional contamination can occur if the piping is serviced or repaired.
It is extremely important that when a new pipeline or plumbing system is put in service or repaired, a thorough sanitizing and cleaning of the piping is done. We are often asked about disinfecting water lines with bleach when bacteria or algae have been found in the house water pipes. Continue reading for tips about shock chlorination and disinfection techniques of water pipes and lines.
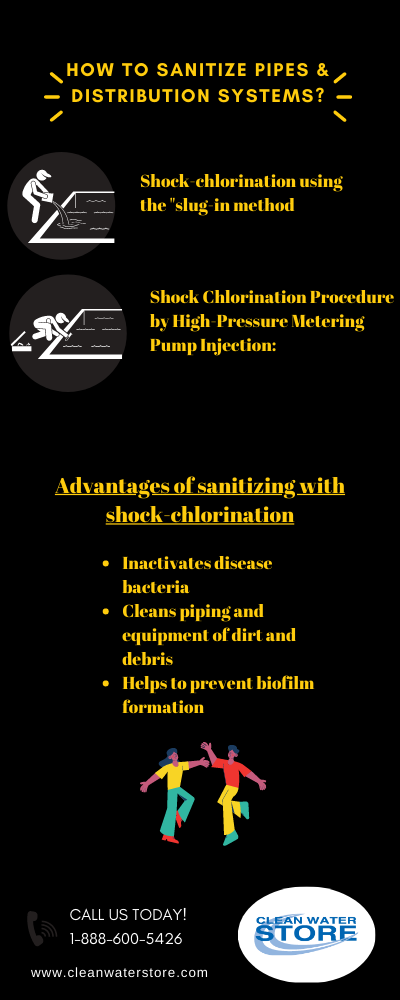
Sanitize Pipes: Advantages of sanitizing with shock-chlorination include:
- Inactivates disease bacteria
- Cleans piping and equipment of dirt and debris
- Helps to prevent biofilm formation
The proper and effective shock-chlorination procedure requires:
1. A dosage of 50 to 200 ppm of free chlorine is evenly distributed throughout the piping and fixtures.
2. Testing the residual to verify that the levels are present at the fixtures and hose bib or valve sections.
3. Contact time with the piping, undisturbed for 12 hours.
4. Retesting of the chlorine residual after 12 hours.
If the chlorine residual is less than 10 ppm after 12 hours, repeat the entire procedure above.
If the beginning dose is 50 to 100 ppm and the remaining residual after 12 hours is less than 10 ppm, this indicates severe bio-fouling or large amounts of dirt or slime present.
Shock-chlorination using the “slug-in method”:
Generally, we don't recommend this method since it relies on introducing a slug or a large amount of chlorine (usually powdered bleach or tablets) into one section of the pipeline and hoping that this concentrated dose will properly sanitize the downstream sections.
This method is unreliable and does not introduce a consistent, evenly distributed chlorine residual of 50 to 200 ppm throughout the system. It allows diluted water with varying residual levels of chlorine to flush through the system. It can also create very high corrosive chlorine levels (over 500 ppm), damaging fixtures, and corrode copper and stainless steel.
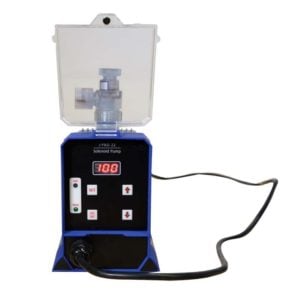
Shock Chlorination Procedure by High-Pressure Metering Pump Injection:
Professional water treatment specialists and distribution system operators typically use this chlorination method to Sanitize Pipes and chlorinate water lines.
The procedure involves leaving the water system or pipeline under pressure and using high pressure, low-volume metering pump to inject a concentrated chlorine solution while the water is flowing at a given flow rate.
After a chlorine residual of 50 to 100 ppm is detected at each faucet or fixture (using a high-range chlorine test kit), the chlorine solution is allowed to remain in the pipes for 12 to 24 hours.
How to use the high-pressure metering pump injection method:
1. Shut off the mainline. Identify an outside hose bib or another opening in the incoming piping on the main valve's customer side.
If a backflow prevention valve is present, these can be utilized, as there is typically a ¼” FPT port available. If no hose bib or opening exists, install a ¼” or ½” threaded opening into the mainline to use for injecting the chlorine solution.
2. Hook up a metering pump to the line (in our example, a 24 gallon/day output metering pump is used), using an injection check valve so the water cannot back-feed into the metering pump. If the metering pump has a different output, adjust the speed of pump or solution strength. In this procedure, a concentrated chlorine residual will be injected while the pipes are under line pressure from the street or city-water system. A check valve is used on tubing leading to the piping to prevent the water from backing up into the metering pump.
3. Make sure to use a metering pump to develop pressures higher than the line pressure you inject into.
4. Determine flow rate. Open up the faucets hot and cold and read the water meter to determine gallons per minute.
5. Use the formula and example below to adjust the metering pump:
Example: Compute metering pump setting to achieve 100 ppm applied chlorine dosage in a water stream flowing at 5 gallons per minute, using full-strength household bleach:
5 GPM x 100 ppm x 1440 (minutes/day) = 13.7 gallons per day 52,500 (ppm of laundry bleach)
The output of the pump is 24 gallons per day.
The example above calls for 13.7 gallons a day output. 13.7 gallons per day = .57 or 57%
Set metering pump speed to 57%
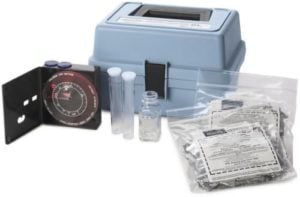
6. Run the water in the building or at a valve or hose bib downstream until the bleach solution has filled all the pipes and a strong odor of chlorine is coming from the fixtures or faucets, both hot and cold. For best results, test the water at each fixture to verify that there is at least a 50 to 100 ppm chlorine residual, using a DPD method test kit.
7. Allow the water to sit for 12 hours. Retest for chlorine residual with a high range chlorine test kit: visit our test kit page.
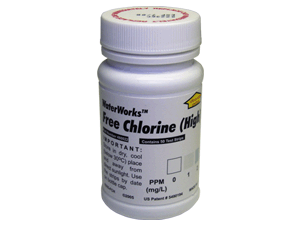
If the water contains less than 10 ppm of chlorine, repeat the entire procedure. The slime, scale, and odor-producing bacteria will interact with the chlorine and reduce chlorine residual in the piping. If it uses up all the chlorine, or the chlorine residual is less than 10 ppm, then the procedure may need to be repeated.
8. Flush the piping and fixtures well to flush out the scale from water from the piping. Unscrew aerators and fixtures to avoid these items becoming plugged with sediment that may have been loosened in the chlorination process.
Caution: If the shock-chlorination procedure is being done on an old pipeline or one that has accumulated scale or buildup, the procedure can loosen up the scale, iron deposits, and other materials in the piping. This buildup in the water pipes can clog fixtures, appliances, and valves in the piping system, causing many problems.
Care should be taken when flushing the piping and all aerators removed to prevent clogging. In some extreme corroded piping cases, the piping could fail and start to leak after this procedure.
(Click here to learn more about sanitizing pipes and disinfection.)
More questions? Call and speak with one of our water experts at 1-888-600-5426 or fill out our Fast Help Form and we will get back to you!


